There are many ways to upgrade a Mediawiki installation. The process has become smoother over the years, but it still requires moving files and executing shell commands. What makes upgrading Mediawiki especially tricky is a lack of standardized backup procedure and the fact that Mediawiki is just lightyears away from the ease of use we know from other systems such as WordPress.
I have just upgraded a 1.24 Mediawiki to the latest 1.26.x version, so definitely a major upgrade, and a medium/big sized one at that. For the first time I used a trick to help me safely upgrade and test it: I cloned my Mediawiki application instance using Cloudways app cloning. While not a revolutionary process, let me outline it for you quickly. A similar way of going about it might apply to server cloning, but it would involve an IP address change and a few other tweaks. So, for small to medium wikis, app cloning is actually the smoothest way.
Prerequisites
- Download the latest Mediawiki to your computer
- Put your „live“ Mediawiki into read only mode to make sure you don’t have conflicting versions
- Read the release notes of the Mediawiki version(s) you are jumping to and inform yourself of possible breaks, changes in templates and especially changes in LocalSettings that are relevant, such as newer ways of calling extensions and skins! You find some of these remarks in the Upgrade file that comes with each release.
- Make sure that however many GB your current Mediawiki installation occupies on your Cloudways server, there’ll be at least that amount and more of free space available on the same (!) harddrive! The process described below will duplicate your current installation so we’ll be occupying at least twice as much space as before (at least temporarily). If that’s not a viable option for you, this will not work (at least not through the ClicknGo interface, an alternate option is to clone the app without copying your images folder, but that’s an advanced option not easily done)
Step 1
We assume here that you have noted and possibly applied changes to LocalSettings required by the newer Mediawiki version (at least in a newer LocalSettings.php on your harddrive, ready to be uploaded). You put your live Mediawiki into read-only mode.
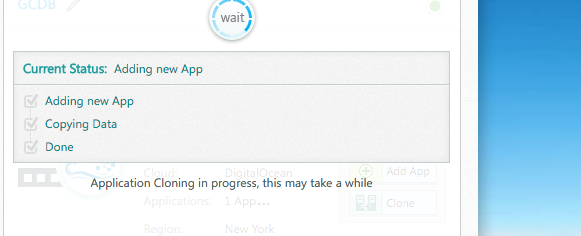
Navigate the ClicknGo interface at Cloudways, pick your server, go to the application tab ,and where you see your application, click „clone“. This will take a while. Once done, you’ll find two applications there, you can rename it to something better to remember such as „App XYZ staging“.
Step 2
For reasons explained further down, we’ll be renaming the application folder we just created (just a symlink, but it’ll help us greatly). Navigate to the staging clone of your app you just created, and where it says „appplication folder“ click „rename“. This will take but a few seconds.

Go back to the server tab, and make sure you know the master credentials. Cloudways recently introduced this, so the best way to access your server is with these credentials. Note those, along with the IP address of the server.
Optional, but highly recommended and ideal: set up SSH access to this server for your computer. This is more secure and lets you access your server password-free from your computer. I really really recommend using SSH to access your server, but won’t cover it in this tutorial.
Optional, but easier for some folks, set up BOTH applications now on a local FileZilla instance, so you can conveniently browse the remote files and your local files. Don’t confuse the „live“ and the „staging“ clone of your application, especially because you access both via the same IP and with the master credentials, but the apps are in different folders (this is why we renamed them above, to help you here).
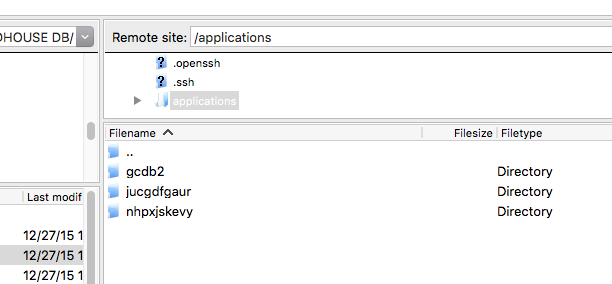
Picture: I SFTPed into my Cloudways server here with master credentials, then enter „applications“ and there I have three folders. The first is just a symlink I renamed to point to my new clone, which is the second folder. The third folder is the original app.
Step 3
Now we have an identical copy of our application, and we have a secure way to access it. As long as we haven’t set a domain for the clone, „access details“ in the app tab will give you a long, cloudways-like URL to test the website. Do that, if it doesn’t work, you need to go troubleshooting already.
Here’s another reason why we renamed the app folder (and thus the username): we do not want both apps accessing the same MySQL database, and we don’t want the two apps now mixing each other up, so what we do next is we edit the clone’s LocalSettings.php file to access the clone’s SQL instance. You can see and verify those credentials in the application management tab. Re-upload the file, and now we „really“ have two identical, but working separate, installations of the same Mediawiki website, each with their own LocalSettings.php file accessing their own distinct SQL database – but on the same server/IP. Cloning could have set this up correctly already, btw.
Step 4
Now you’re asking what about a backup? The original „live“ app IS the backup. You can, and I recommend, make an additional, traditional backup, just as you are used to, but for simplicity sake I assume here that if we screw this up, all we screwed up is the clone and we can just delete it, no harm done to the live app. Repeat: the process described here does not touch the „live“ installation (we merely put it in read only mode).
The next step is to „clear“ the clone of old Mediawiki files, a recommended process to avoid legacy files interfering with your application or just legacy garbage. So you delete all files from within your cloned Mediawiki application, but you leave LocalSettings.php, the images folder, and any extensions you need, or custom skins, untouched. If there’s anything essential in your .htaccess or robots.txt files, then leave those as well (and obviously anything else that’s non-Mediawiki that you need to preserve). Delete the rest either via shell („rm…“) or via FileZilla (a lot slower).
Now, from your harddrive, upload the latest Mediawiki (e.g. 1.26.2.) files to the cloned app’s remote directory (or upload and unzip there). The cloned app has now jumped to the latest version, but the upgrade would be yet incomplete.
Step 5
Ensuring that the LocalSettings.php file in your new directory has both the correct SQL credentials as well as all the changes made necessary for the latest Mediawiki (and possibly uncommented any old extensions that might cause conflicts during upgrade or skins no longer needed), we are now ready to perform the upgrade.
One major change with the latest MediaWiki versions is how skins are called (wfLoadSkin( ’skinname‘ );) and extensions (wfLoadExtension( ‚Extensionname‘ );).
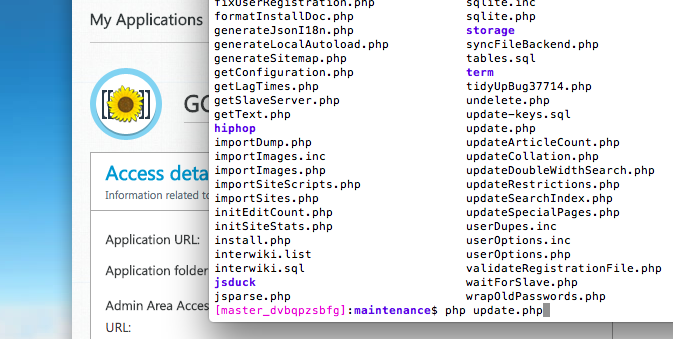
SSH into your server via a terminal window using the master credentials, cd to your staging app’s directory, and cd maintenance, then „php update.php“ – it will go relatively quick, and you’re done! Browse to your staging app (again, it is that longer URL), and ensure it all works correctly.
Step 6
At this point, knowing you have an „additional“ (regular) backup, will help you feel better :)
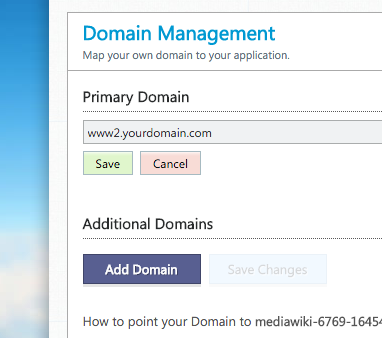
Go to your (old) live app’s tab, and in „domain management“ change the primary domain to something other, e.g. ww1…. or god knows what, and then jump to your staging app’s domain section and enter the live domain there. This will take a few moments, but then YOUR NEW, UPDATED APP FROM THE STAGING DIRECTORY will actually be live via yourdomain.com
Verify that everything works (also remove read only mode and test uploads and edits). If everything works, you „could“ just delete the old „live“ site as your clone site is now live. Obviously the main reason is to free up hard drive space. And repeat the same process for the next upgrade.
Optional: Enter the SQL manager and optimize your database tables. Delete cache. Clean up LocalSettings.php, update all your extensions to latest stable versions!
Pretty smooth actually, once you familiarize yourself with this procedure. You’re welcome. If you wanna give Cloudways a try, do me a favor and use this link to sign up there for a test.

